The simplist way to use different fonts in your web site is using fonts from the “Web-Safe” fonts[1] [2].
But, no impressive design will depend only on these web-safe fonts, and designers add their own preferable fonts to the web site they are building.
How to add your preferable fonts?
Fonts comes as files that you have to upload to the site, and then reference them in the CSS file.
Usually font vendors provide fonts with different formats in order to be consumable by many different browsers.
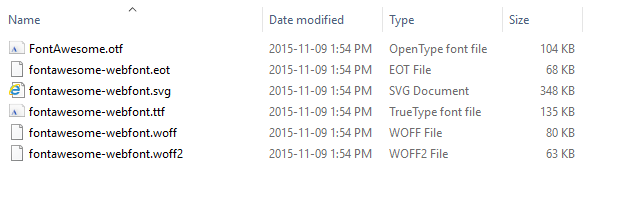
For example, this is the files come with the font “Font Awesome”:
Using the font files in our web page:
After we upload the font files into the web site, we add them into the css files as @font-face rule.
The @font-face rule will create the definition for the rule, and later we can use that definition.
The syntax to do that is as follows:
1@font-face {
2  font-family: (family-name);
3  src: (the url for the font file);
4}
Where font-family is a our own name that we give to the font which we are going to use later.
src : is the url for the font file that we uploaded.
An example for that
1/* font deceration */
2@font-face {
3  font-family: "MyFont";
4  src: url("http://my_server.com/fonts/mycustomfont.ttf"),
5    url("http://my_server.com/fonts/mycustomfont.woff2");
6}
7
8/* font usage */
9body { font-family: "MyFont", serif }
The above code uses only two file formats (ttf and woff2), but as we can see not all of the browsers support these formats, so we will end up adding more than one file type.
We will see down later how to do that, but first let us see what are different file formats for the font.
Understand the differnt font file formats:
There are many different types and formats of the fonts.
And you need to know a little bit of them to know which one you choose:
1. WOFF/WOFF2
Stands for (Web Open Font Format). Created for use on web only.
They are compressed, and they contain license info and metadata.
WOFF2 is the newer version and it is more compressed and faster that the older one.
WOFF2 is becoming the de-facto standard for font formats for all devices and modern browsers.
If you don’t care about old browsers navigating to your site, then you can just add a reference to this file format only.
2. SVG/SVGZ
Stands for (Scalable Vector Graphics Font).
Is a SVG vector format for the font. It is small, which make it perfect for mobile. But with new mobiles support WOFF2, it is becoming less used.
3. EOT
Stands for (Embedded Open Type).
This is very old format from Microsoft, and it is only supported by IE, and it is the only format that IE 8 and lower will recognize.
4. OTF/TTF
Stands for (OpenType Font and TrueType Font).
OpenType was an enhancement on TTF, and both were supposed to be an open standard format, but later WOFF was created to add a licensing to prevent illegal copying of fonts, and OTF became history.
Supporting all browsers and font formats
As you can see, not all browsers support all formats, so it is the designer’s responsibility to specify the Url(s) for all these files when defining the font face.
So more real example of using the @font-face rule is as follows:
1@font-face {
2     font-family: 'MyWebFont';
3     src: url('webfont.eot'); /* IE9 Compat Modes */
4     src: url('webfont.eot?#iefix') format('embedded-opentype'), /* IE6-IE8 */
5     url('webfont.woff2') format('woff2'), /* Super Modern Browsers */
6     url('webfont.woff') format('woff'), /* Pretty Modern Browsers */
7     url('webfont.ttf')  format('truetype'), /* Safari, Android, iOS */
8     url('webfont.svg#svgFontName') format('svg'); /* Legacy iOS */
9 }
The order is important, because the browser will pick the first compatible format it incounter.
So, it is important to have woff2 format as almost the first one after the IE compatible ones.